


After ruining one too many vegetables (and nearly my fingers in the process), I finally learned how to use a knife sharpener. Trust me – it's a game-changer for your cooking experience.
In this guide, I'll walk you through exactly how to use different types of knife sharpeners, from the simple pull-through models to rolling sharpeners and honing rods.
1. The Three Most Common Knife Sharpeners (And When to Use Each)
Before we dive into techniques, let's get familiar with the main types of sharpeners you might have in your kitchen drawer.
1) The 3-Slot Knife Sharpener

3 slot knife sharpener is probably what comes to mind when most people think of a "knife sharpener" – a small device with slots that you pull your knife through. These knife sharpeners typically have multiple stages that progressively refine your blade from "can't cut butter" to "slices through paper with ease."
Best for: Everyday kitchen knives that need regular maintenance and cooks who want simple, foolproof sharpening.
2) The Rolling Knife Sharpener

The rolling knife sharpener uses a wooden roller with diamond-coated discs that you roll back and forth along your knife edge. It usually comes with a magnetic base that holds your knife at the perfect angle.
Best for: Higher-end knives, especially Japanese-style blades that benefit from precise angle control.
3) The Sharpening Rod (Honing Steel)

That long metal rod that came with your knife block? Despite often being called a "sharpening steel," it doesn't actually sharpen your knives. Instead, it realigns the edge between more serious sharpening.
Best for: Daily maintenance between proper sharpening. Think of it like brushing your teeth between dental cleanings.
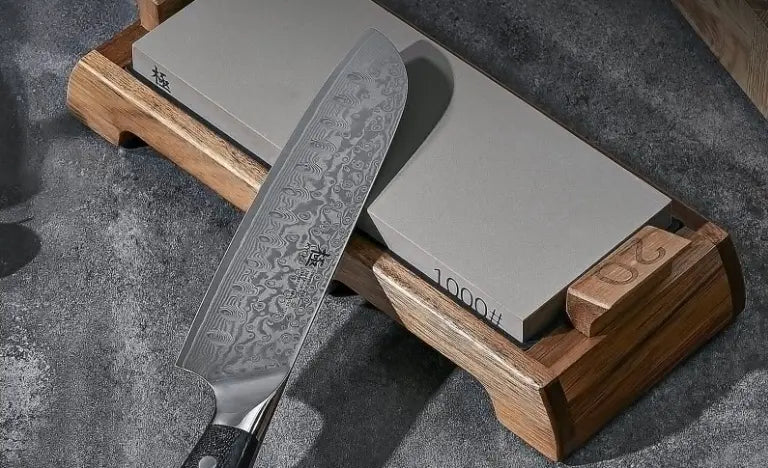
And of course, whetstone is also a knife sharpener but it's more complicated than these three knife sharpener when it comes to using them.
(In case you're interested about "How to Use a Whetstone to Sharpen Your Knife")
2. How to Use a 3-Step Knife Sharpener
The beauty of these sharpeners is their simplicity. Each slot serves a specific purpose in bringing your dull knife back to life.
First Slot: Repair and Reshape
The first slot usually contains the coarsest material (often carbide or diamond) that repairs damaged edges.
Place your sharpener on a steady surface – I like using it right on my cutting board. Hold the handle firmly with your non-dominant hand. With your knife in your dominant hand, place the heel of the blade (the part nearest the handle) into the first slot.
Apply light pressure downward – not too hard! Pull the knife through in one smooth motion from heel to tip. The key here is consistency and letting the sharpener do the work.
For a moderately dull knife, about 3-5 pulls should do it. For a seriously neglected blade, you might need 5-7 passes. You'll hear a scratching sound – that's normal. The sharpener is reshaping your edge.
Second Slot: Sharpen

The middle slot contains a finer abrasive material that refines the edge after the heavy lifting in slot one.
Using the same technique, pull your knife through the second slot 3-5 times. Use slightly less pressure than you did with the first slot. This stage is shaping that V-edge that makes your knife slice effectively.
Third Slot: Polish
The final slot contains the finest material (often ceramic) that polishes and fine-tunes your edge.
Pull the knife through another 3-5 times with light pressure. This removes any rough burrs and creates that clean, sharp finish. After you've finished all three slots, rinse and dry your knife to remove any metal particles.
I remember the first time I properly used all three stages – I tested my knife on a piece of paper afterward and watched it slice through like butter. That satisfaction alone is worth the effort!
3. How to Use a Rolling Knife Sharpener

Rolling sharpeners look fancy, but they're actually pretty straightforward once you understand the concept.
Start by placing the magnetic angle base on a flat surface. The beauty of these sharpeners is that the magnetic base takes care of the hardest part of sharpening – maintaining a consistent angle.
Place your knife flat against the angled magnetic base. It should hold your blade at approximately a 15-degree angle, which is perfect for most kitchen knives.
The roller usually has different grits on each end – coarser diamonds on one side for sharpening, finer on the other for polishing.
Grab the roller by the wooden handles and place the coarser end against your knife edge. With gentle pressure, roll it back and forth along the blade, covering the entire edge from heel to tip.
The motion should be smooth and controlled – kind of like rolling out a small piece of dough. Don't press too hard; let the diamonds do the work. About 10-15 back-and-forth passes should be enough for one side.
Then reposition your knife to sharpen the other side, and repeat the process.
After you've sharpened both sides, flip the roller to use the polishing end and give each side 5-10 passes to refine the edge.
The first time I used a rolling sharpener, I was surprised by how little pressure was needed. These tools are precision instruments, not grinding wheels – gentle, consistent pressure yields the best results.
4. How to Use a Knife Sharpening Rod
Despite what many people think, that long metal rod isn't actually for sharpening – it's for honing. The difference is that sharpening removes metal to create a new edge, while honing realigns the microscopic teeth of your blade that bend during use.
The most stable way to use a honing rod is to hold it vertically with the tip resting on a cutting board or towel. This gives you a consistent reference point.

Hold the handle of the rod in your non-dominant hand. With your knife in your dominant hand, place the heel of the blade against the top of the rod at a 15-20 degree angle (imagine the angle made by placing three quarters under the blade).
Now, while maintaining that angle, pull the knife downward and across the rod in one smooth motion, as if you were trying to slice a thin layer off the rod. Use very light pressure – you're straightening the edge, not grinding it.
Alternate sides with each stroke – one pull on the right side of the rod, then one on the left. This ensures even honing on both sides of your blade.
For regular maintenance, 5-7 strokes per side is plenty. I hone my chef's knife before each cooking session – it takes less than 30 seconds and makes a noticeable difference in performance.
5. Why Your Knife Still Feels Dull (And How to Fix It)
"I tried sharpening my knife, but it's still dull!" I hear this all the time, and there are usually a few common culprits:
You're Rushing Through the Process
Knife sharpening isn't a race. Each pass through your sharpener needs to be deliberate and controlled. I used to rush through the process and wonder why my knives never got razor-sharp. When I finally slowed down and focused on technique, the results improved dramatically.
Solution: Take your time. Make each pass count with consistent angle and pressure.
You're Skipping Steps
With a 3-stage sharpener, each stage serves a purpose. Skipping to the final polishing stage might seem like a shortcut, but it's like trying to polish a scratched car without sanding it first.
Solution: Always work through all stages in sequence, even if you think your knife only needs a "touch-up."
Your Angle Is Inconsistent
This is the most common problem I see. Varying your angle even slightly creates an uneven edge that won't cut efficiently.
Solution: Let your sharpener guide the angle. With pull-through sharpeners, let the slot do the work. With rods, the vertical technique I described helps maintain consistency.
You're Using Too Much Pressure
More pressure doesn't equal more sharpness. In fact, pressing too hard can damage both your knife and your sharpener.
Solution: Use just enough pressure to maintain contact. Let the abrasive do the work, not your arm strength.
6. Answers to Your Most Common Knife Sharpening Questions
After helping countless friends sharpen their kitchen knives, I've heard all of these questions more than once:
"How many times should I pull the knife through each slot?"
For moderately dull knives, 3-5 passes through each stage of a pull-through sharpener is typically enough. For very dull knives, you might need 5-7 passes through the first stage, then 3-5 through the remaining stages.
With a rolling sharpener, about 10-15 back-and-forth rolls on each side with the coarse grit, followed by 5-10 with the polishing grit, usually does the trick.
The key isn't the exact number but consistency and thoroughness. If your knife isn't sharp after the recommended passes, try a few more rather than pressing harder.
"Should I push or pull when using a sharpening rod?"
Always pull the knife downward and across the rod. Pushing upward can be dangerous if your hand slips. The pulling motion also helps create the proper realignment of the edge.
"Why can't I get a burr to form when sharpening?"
A burr is that tiny ridge of metal that forms on the opposite side of the edge being sharpened. If you're not feeling a burr, you might not be:
-
Using enough passes on the coarse stage
-
Maintaining a consistent angle
-
Using enough pressure (though too much is also problematic)
Try adding a few more passes while focusing on keeping your angle steady.
"Do I need to wet my knife sharpener?"
For standard pull-through sharpeners, rolling sharpeners, and honing rods: no, use them dry.
For whetstones (another type of sharpener not covered in detail here): yes, most require soaking or at least wetting before use.
Always check your specific sharpener's instructions, as there are exceptions.
"Can I ruin my knife by sharpening it incorrectly?"
Yes, but don't let that scare you away from sharpening altogether. The most common ways knives get damaged during sharpening are:
-
Using excessive pressure that creates too much heat
-
Sharpening at wildly inconsistent angles
-
Using the wrong type of sharpener for your knife
Start with light pressure and focus on consistency, and you'll avoid most problems.
7. How to Know When Your Knife Needs Sharpening

Don't wait until your knife bounces off a tomato to sharpen it. Look for these earlier warning signs:
-
Your knife slips instead of grips when starting a cut
-
You find yourself applying more pressure than usual
-
The knife crushes soft herbs rather than cleanly slicing them
-
Paper test: Try to slice through a piece of printer paper - a sharp knife will cut cleanly without tearing
I like to do quick maintenance before my knife reaches the frustration stage. A sharp knife is actually safer than a dull one because it requires less force and gives you more control.
8. Keeping Your Edge Longer
Even with perfect sharpening technique, knives will eventually dull with use. Here's how to extend the time between sharpening:
-
Use wooden or plastic cutting boards - never glass, marble, or granite
-
Hand wash your knives (dishwashers are knife destroyers)
-
Use a honing rod regularly to maintain alignment
-
Store knives in a block, on a magnetic strip, or with blade guards to protect the edges
I've found that a 10-second honing before each cooking session keeps my knives performing well for months between proper sharpening.
9. Conclusion

Learning to properly use a knife sharpener changed my cooking experience completely. Foods I used to struggle with (looking at you, cherry tomatoes) suddenly became easy to prep.
Whether you choose a simple 3 slot knife sharpener, a precise rolling system, or just commit to using that honing rod that came with your knife set, it doesn't have to be complicated for maintaining your knives’ edges.
Start with whichever method seems most approachable to you, practice your technique, and enjoy the satisfaction of cooking with truly sharp knives.
You can also browse Kyoku chef blog if you are interested in more about kitchen knowledge, Japanese knife guides, and even Japanese knife tradition!

